Wednesday, December 25, 2013

Merry Christmas!

Just wanted to show off what I made for my momma this year! You may remember my tutorial I posted last year on the Yarn Ball wreath, well here's what I made her!


Hope you all have a very Merry Christmas!

Tuesday, December 24, 2013

You're all winners!

I would like to thank everyone who commented for their chance to win! The grand prize winner is...

Stephanie Valdez

Stephanie will be receiving the pre-made Happy Christmas mini PLUS a free digital download of the printable. But, since it's Christmas, I want you all to win...therefore, I will be contacting the others who commented and sending you all a link for the mini album download too! I hope to have that to you guys by the end of the weekend. Thanks so much for all of you who have participated! Hope you all have a very merry Christmas!!!!

Sunday, December 22, 2013

Pinspiration Sunday: Christmas Balls in a Shadow Box

So I've seen various takes on displaying either Christmas balls or bells in a shadow box with a cute phrase attached in or around it. Well here's my take on it: 


I bought 2 shadow boxes about 6 weeks ago from a local thrift store I paid $3 each for them. Since they were an already made up, manufactured decoration, I had to take it apart first. Once it was apart, I took the cardboard backing and covered it with Mod Podge and pressed the burlap onto it. 


Once that dried, I cut the excess burlap off around the cardboard edges. 
I bought some small ornaments on black friday from Kmart for about $3. I put them inside the frame. Now the frame wasn't quite deep enough from my ornaments so I couldn't use the nails that were located on the back to hold the cardboard in place. Instead, I taped the cardboard back on. Next, the fame was a little beat up with a few spots that had some sticker residue. 


For that I simply took a sanding block and sanded the white frame. Then I took a damp cloth and wiped the frame down. 
Next it was time to decide what to write on the front. I was originally thinking about cutting something out with vinyl on the cricut machine but then I remembered something else I bought on black friday. I got this from JoAnn Fabrics for $5!


I chose the word "peace".

It's a sticker, so I just stuck it on the front glass.


And there you have it....a Christmas ball shadow box decoration. 


Hope this inspires you! Thanks for stopping by!


Friday, December 20, 2013

Homemade Coffee Spa Essentials

I am a coffee lover...not only do I love coffee but I love flavored coffee. My favorites would be vanilla and hazelnut...or the combo of the two. So when I was deciding to make some homemade sugar scrubs for Christmas gifts I thought that coffee would be a great idea. This is the perfect gift for people who love the smell of coffee but either cannot drink it or don't want to for caffeinated reasons. So give them the gift of coffee that they can enjoy. Not only that but caffeine is great for your skin! Don't believe me?!?! Check out this information from LiveStrong.

When I made mine I decided to a vanilla hazelnut coffee, but you can use any coffee you wish. I also had on hand ground coffee so that saved me the step of grinding it myself. 

Coffee Sugar Scrub:
1 1/2 cups granulated sugar
1/2 cup ground coffee
 oil (I used almond oil but you could use coconut too)
1 tsp. vanilla extract

Mix the sugar and coffee together. Add oil until you get a nice consistency (about 1/4 - 1/2 cup). Add one teaspoon of vanilla extract (just a little extra kick of vanilla). 

Once you mix it all up...take a minute and breathe in that amazing smell....then fill some fun jars and label them. This is how mine turned out.


I loved the sugar scrub so much I also went a step further and made coffee infused bath salts.

Coffee Bath Salts Recipe:
1 1/2 cups Epsom Salts
1 cup baking soda
1/2 cup table salt
3 Tbsp ground coffee
3 Tbsp brewed coffee (cooled)

Mix together the first 4 ingredients. Next, carefully pour brewed coffee and stir well. Make sure the mixture is well mixed and all clumps are removed. Allow the mixture to sit out in an opened container for 24 hrs or until dry. Mix as needed to break up clumps and allow thorough drying. Once it is dry, place in jars and label.


Thanks for stopping by!


Thursday, December 19, 2013

Twig Tree Decoration

Looking for a last minute gift idea for someone who has everything? Or maybe you just want crafty idea for yourself? Either way this is the perfect thing...a twig Christmas tree!


I found a image of a twig tree floating around Pinterest and had to try it.

Here's what I used:

8 X 10 canvas
burlap
mod podge
sticks I collect from our town park
yarn (which I had left from this project)
berries from a berry garland
wire cutters (to cut the berries off the garland)
Marion Smith's Vintage Trinkets
hot glue & gun


First I attached my burlap to the canvas. I used Mod Podge to cover the front surface and along the sides. I smoothed out a piece of burlap over top the canvas. I then flipped it over and pulled the burlap tight all the way around it and secured it with hot glue. I allowed the mod podge to dry.
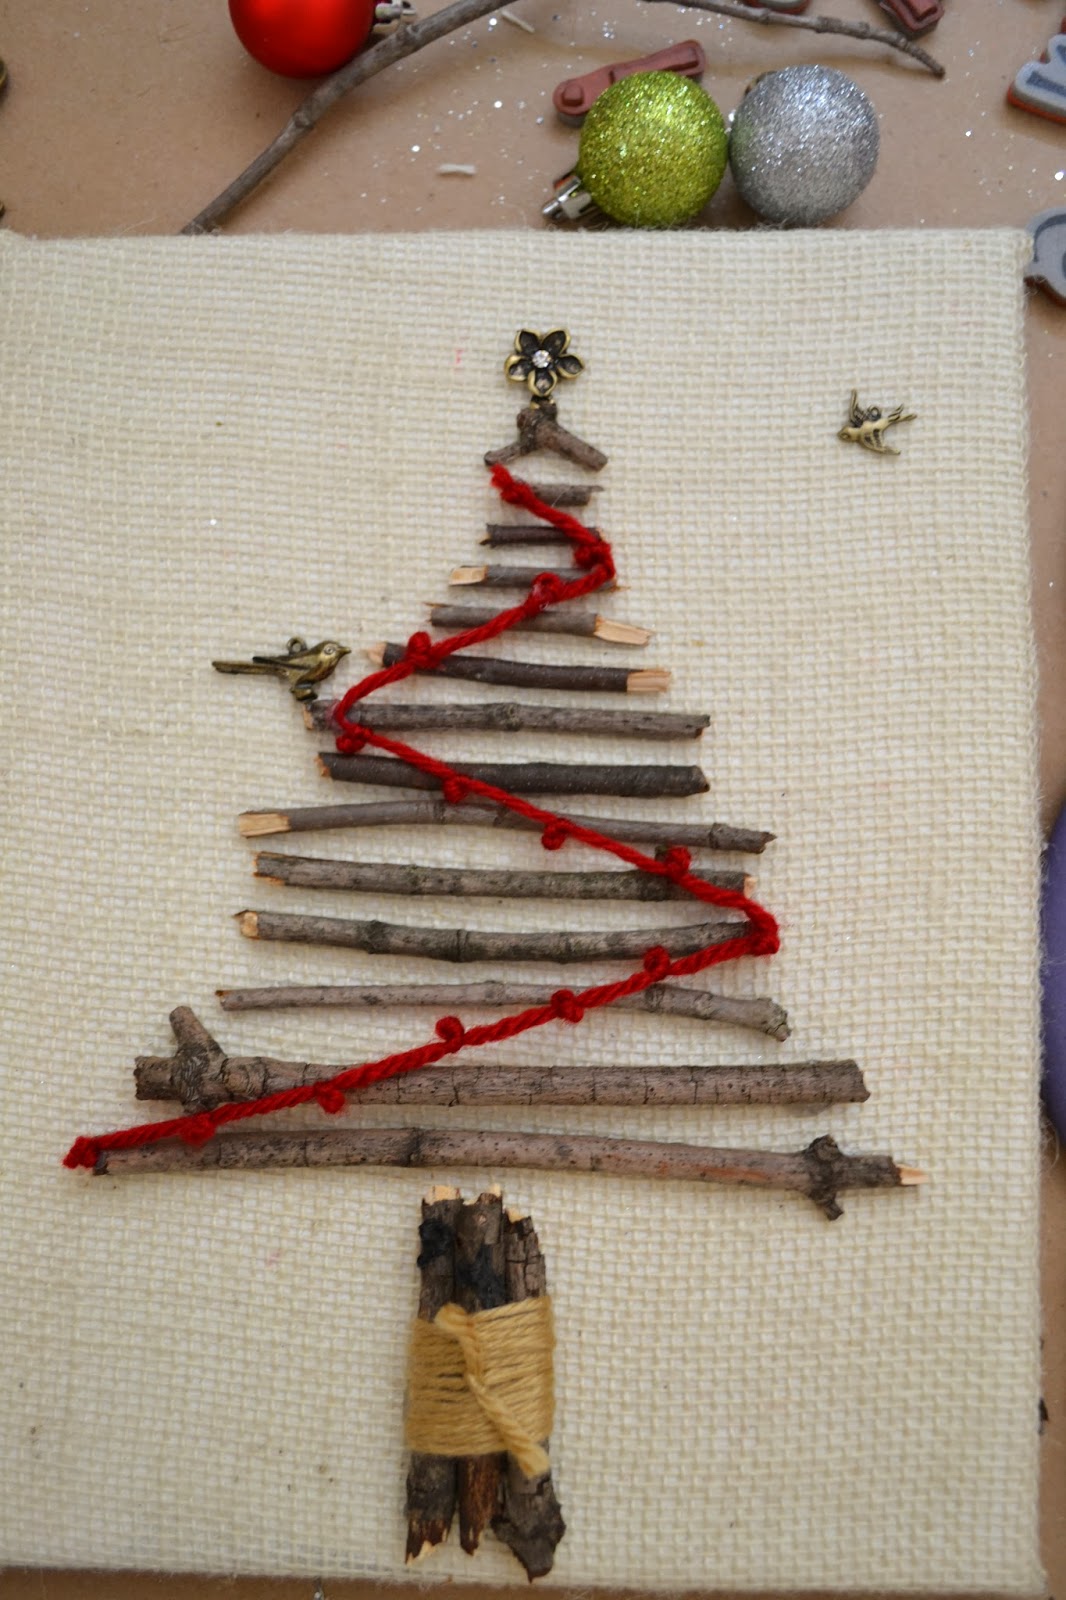
Next, I broke my stick pieces and lined them up on the canvas to take the shape of a tree. 


Next I decided to wrap yarn around the "trunk" of the tree. I just wrapped the yarn around it several times and then tied a knot in front. I then glued all the sticks in place. And added some Marion Smith vintage trinkets as the tree topper and some extra embellishments.


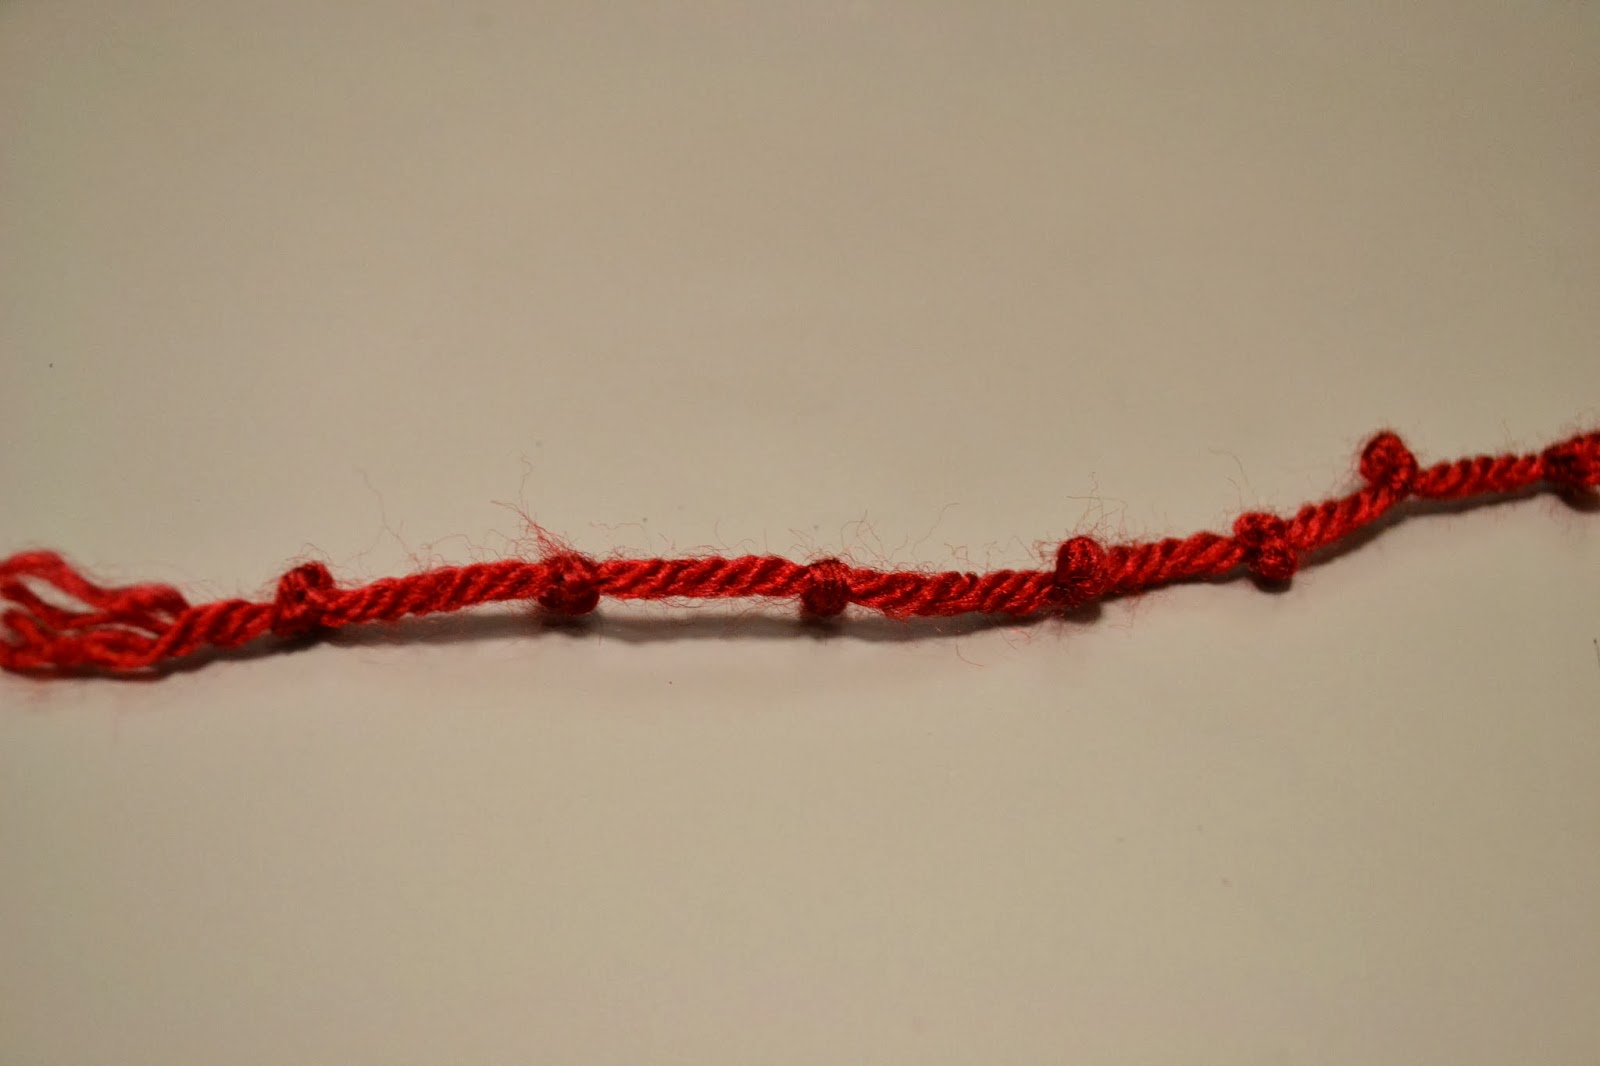
Then I made the garland. I took a piece of red yarn and tied knots along it. The knots were made tying them 3 at a time together then moving about an inch (guessing, I didn't actually measure them) away and tied the knots again.


Then I hot glued the yarn in a zig-zag pattern going up the tree.


Next, I finished decorating the tree by adding berries I had from a berry garland I bought awhile ago on clearance from A.C. Moore. I used wire cutters to remove the berries then hot glued them into place.


Here's the finished tree!


Hope you enjoyed this quick last minute Christmas decoration. Thanks for stopping by!


Tuesday, December 17, 2013

DIY Colored Book Page Ornament


Every year near Christmas we have a celebration week at work. Each day is something different. One day is ornament day. You bring in ornaments and we pick another's to take. Last year I got a set of four. And they were pretty, but they were gold...and I am not a fan of gold. No worries, I have a DIY project.

Here's what you'll need:
an ornament to cover
book pages
mod podge
paint brush
wire cutters
food coloring
berries and leaves
hot glue 
stick (or as I used, a wooden spoon) to hang your drying ornament

 As I have stated in a number of other posts, I have a few old Reader's Digest books laying around...so I used one of those and ripped up some pages. Next I attached the pieces of the book pages to the ornament using mod podge (sorry I didn't take a pic of that, but I think you can see what I mean in the next picture). I made sure none of the original ornament was showing. I allowed that to dry. After it dried, I mixed some red food coloring with some mod podge and brushed that over the entire surface. I hung it on a spoon hanging over a table to dry.


 Once it dried I used 2 leaves from a pack of Recollections' Holly leaves... as well as a few berries from a Christmas pick I bought from AC Moore a few years back. (I used a pair of wire cutters to cut the berries I wanted from the pick).
I figured out where I wanted them on the ornament and then I hot glued them in place. Once I was finished I had something like this:


Hope you liked this simple and fun tutorial. Let me know if you try it out! Thanks for stopping by!

Sunday, December 15, 2013

Pinspiration Sunday: Yarn Wrapped Wreath with Felt Flowers

So I found a beautiful wreath from ItzFitz Etsy shop on Pinterest. It looked so stinking cute that I thought, "hey! maybe I could make that". And so I tried...and here's how it turned out:


I got my yarn and berries from AC Moore. And I had felt on hand from previous projects. I bought a straw wreath from Wal-Mart. I wrapped the yarn around the entire wreath. Then I used the red and green as accents. I secured the loose ends with hot glue on the back side of the wreath. Next came time to make the felt flowers. Here's a quick video to show you how I made them. 


Next I just cut my berry stems and arranged them where I liked them and then hot glued them into place. And that was it. This project was neither quick nor simple for me. The wrapping of the tan yarn took a long time and I struggled making the felt flowers at first but I finally found a method. After numerous ideas for decorating the wreath I finally came up with this and I love it. I hope you do too. Thanks for stopping by!

Friday, December 13, 2013

Happy Christmas Printable Mini Album GIVEAWAY!!!

Hello Everyone!!!! Here's my printable mini scrapbook and giveaway. To enter the giveaway, simply comment on this post OR and comment on the YouTube video for a chance to win this mini plus the digital download! I will randomly pick a winner on December 24th. 


The printable kit includes 20 scrapbooking pages, 2 pockets, 8 small cards for journaling or for photo mats, 2 pocket inserts plus 15 words/phrases to cut and add to any page. This printable is available at my Etsy shop for only $10. So don't forget to comment to enter for your chance to win this pre-made album PLUS the digital download! Good luck, everyone! And thank you for stopping by!

UPDATE:
This giveaway is now over. To see the winner please visit this post.

Wednesday, December 11, 2013

Christmas Cheer Sign

Hello everyone! I don't know about you but my son and I love the movie Elf. So to celebrate Christmas and our love for that movie I made this sign:


I made this just as I have showed you in the transfer a photo to canvas tutorial. You can get this printable HERE. Yes, it's supposed to be backwards because when you transfer it, it will flip. The supplies are the same as in the original tutorial but here's what you'll need:

a laser copy of printable
liquitex matte gel medium
8X10 canvas
paint brush
water 
time and patience

This process takes time to unveil the final project and is pretty messy, but it's worth it. And for those of you who don't want to go through the transfer process, there is a forward facing printable also available at the above link. I hope you enjoyed this. Thanks for stopping by!  


Sunday, December 8, 2013

Pinspiration Sunday: Christmas Card Holder


So awhile back on Pinterest I saw a pin of a picture holder made from an old frame. And I thought it was really simple and cute and maybe one day I would make it. Then Christmas season came. Now I always just tape my cards to the closet door in the living room because I really had nowhere else to put them. But this year I remembered that pin I saw. I had this hideous picture from a gift exchange at work. It’s kind of a joke that started before I came to work at this hospital but I wasn't disappointed when I got it cause all I thought was, “I bet I can make something out of this”. And now I have.

Here’s what I started with:


I took the backing off and removed the picture and glass. Next I sanded the frame down.


Then I mixed some paint up to get a nice minty green color. I painted the entire frame and allowed it to dry overnight. The next day I sanded it down again to get a distressed look. Once I had it sanded to my liking, I cleaned it off then put a coat of Mod Podge on it. I allowed that to dry.


Next, I took twine and tied 4 strings across it. To help the twine stay in place I put a dab of hot glue on the back side of the frame. I originally wanted to keep the staples in on the sides that helps hold everything in place and tie the twine to that but one had fallen off. I tried to tack it back in but unfortunately because of my Rheumatoid Arthritis I have recently become very weak in my right hand/wrist (which is my dominate side) so I have to adjust my crafting to accommodate my abilities. But I really like the ties on the front of the frame anyways.


 So that’s it. To hold the cards in place I have super small clothes pins from my son's first birthday bash. This project was 100% FREE because all my supplies were just lying around. I do think that this frame will ultimately be too small for all the Christmas cards we get so maybe next year I’ll redo it with a bigger and thicker frame I pick up from my thrifting. But until then, this will do.


Thanks for stopping by and checking out my project!