Sunday, April 28, 2013

Pinspiration Sunday: DIY Jewelry Organizer


Here's my Inspiration:


When I came across the above pin from The Charity Wedding, I thought...that could be fun to make. I have lots of burlap that I need to start using more of so this project is perfect…and while I’m at it, I’ll make a second one as a gift!

Here’s what I used:
Piece of wood (I got a 24X24in piece for under $10 from Lowe’s and my hubby sawed it in half)
Burlap
Mod podge
Scissors
Various drawer pulls hardware
Hot glue
Drill and bits
Sand paper/block
Pencil
Ruler
Iron and Ironing board
Eye hooks
Ribbon/lace or anything else you want to decorate with


First I just placed my hardware on the board to get an idea of where I wanted it. I used my ruler to make sure the sides were symmetrical (Well actually I did that more so on the one that will be a gift…mine I just sort of eyeballed it). I then marked the placement of my holes for the hardware.


Then I drilled the holes and sanded over them to get rid of any fragments of wood.( Special Note: My husband shared with me that the holes should actually be larger than the screws IF the hardware is threaded. I didn't know this...and I had to fix it. He says the screws should just glide through the wood but screw into the hardware.) You may want to wait to drill the holes AFTER the Mod Podge step...The Mod Podge filled the holes (duh! on my part) which made it more difficult to put the screws through. [I re-drilled my bigger holes after I mod podge and drill through the burlap and it DID NOT mess anything up] I also drilled holes along the top for the eyehooks (to hang it).


I placed the wood pieces on the burlap and cut an extra 1-2inches so that I could fold it over to the back.


Next, I mod podged the front side of the wood and firmly pressed the burlap down and allowed it to dry completely.
Then it was time to adhere the burlap around the sides to the back. I started by cutting diagonally across my corners so that the corners didn’t get too bulky.


I used the hot glue gun to adhere the burlap to the back starting in one corner and working my way around.


After that cooled, I started to attach the hardware. Unfortunately my nails were too long so I had to head back to Lowe's and get shorter nails.


Next I hot glued some lace to the top for decoration.


I used twine to hang it. Here's the organizer in action again:


Bracelets and earrings:


Rings


Earrings


And this is what I made for my friend. HaPpY BiRtHdAy, AnGeLa!

Sunday, April 21, 2013

Pinspiration Sunday: DIY Mason Jar Soap Dispenser

Here’s an awesome Mason jar project! This project was from Julia over at Blissfully Content. Here's her beautiful jar:


For Christmas my brother-in-law and future sister-in-law got me Vanilla Bean Noel foaming hand soap from Bath and Body Works. Once that was gone I saved the pump for a future project…this is that project!!!! Here’s what I used:

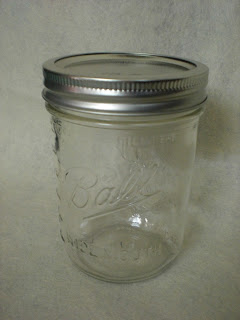
Mason jar
Soap dispenser pump
Drill and drill bit
Needle nose pliers
Glue dots
Mod podge
Scissors
Hand soap to fill your finished jar


I used a pint sized, wide mouth jar for my project.


First I drilled a hole into the center of the lid. The largest drill bit I had was ½ inch. This wasn’t big enough for my pump so I used needle nose pliers and bent the edges back until the pump could fit into it snuggly. I also used the pliers to then flatten the pieces I pulled back against the lid.


Then I inserted the pump and attempted to screw the lid on, however the stick was too long so I had to cut a little bit off the end until it was short enough for me to screw the lid on.


Next I wrapped the jar with yarn I had left over from my yarn ball wreath. I actually wanted to use twine but I was all out…I’m not sure how I let that happen…however the red yarn with sequins looks good too and I think it would be nice to have this out during the holiday season. As I got towards the bottom of the jar it starts to curve and my yarn kept falling off so to help get a few more rows on I used a few glue dots to help it stick. I stuffed the end of the yarn under one of the rows and applied a small amount of mod podge to it to help it from unraveling.


This is my final jar:


I'm not sure how I feel about the lid just yet. I may end up spraying it with spray paint and seal it up...haven't decided yet. If I do I will be sure to post an update :)

Sunday, April 7, 2013

Pinspiration Sunday: Decoupage Plate Covers

I started pinning about a year ago and one of my very early pins was decoupage light switch and electrical socket covers. My original pin was from The Real Housewives of Riverton. Here's what they did:


This is how I made mine. All you need is the covers you want to makeover, Mod Podge, ink (for the edges if you like that look), scissors and paper. I bought some new covers from Lowe's just incase this did not turn out well...LOL..but it did! Anyways, those covers were just over $1 each.


Once I found which scrapbook paper I wanted to use, I traced the plug openings on the back side of the paper.


Then cut the holes out,inked the edges around the holes and then attached the paper to the cover by I covering the plate front with mod podge and lined the holes up and smoothed out the paper making sure not to leave any air bubbles. The edges were curved back so I made sure the paper was completely against the plate and allowed this to dry.


After it dried, I cut along the edge.


Next I mod podged the entire surface again and allowed that to dry overnight. (I actually wanted to ink the outside edges prior to this but I got a little too eager…oops! Finally, I attached the plate to the electrical socket.


And there you have it. I plan on making more and when I do I will be sure to post the pictures of the finished covers.

Wednesday, April 3, 2013

Big Bag of Burlap

A few weeks ago an old friend from grade school got in touch with me via Facebook. She knows that I'm a crafter and that I love burlap and when the art department at the elementary school where she works was going to throw out unused pieces; she called me to see if I want it…for FREE! Whoo hoo! And ummm…yes, please! So we arranged for me to pick it up. Well when I got there it was a GINORMOUS garbage bag full…


I’m so excited! I can’t wait show you the awesome things I make! Keep checking back because I have been pinning up a storm for burlap projects!


THANK YOU SO MUCH, SHANNA!!!!