Showing posts with label wood. Show all posts
Showing posts with label wood. Show all posts
Sunday, February 5, 2017
I'm Still Here and I'm Getting Crafty
Complications from my surgery and a series of unfortunate events have held me back from my Fall projection of getting back into crafting. But I'm here! And here's the latest...Enjoy!
Wednesday, February 11, 2015
A little Love
Hey guys! It's been so long...I've missed ya! So my life got a little crazy in October with the birth of my daughter...which was to be expected. I found a little time this weekend to work on a project finally. Here's the video:
Also, if you haven't already, check out these posts for free printables to create more
Valentine's Day decor.
Thanks for stopping by!
Thursday, December 19, 2013
Twig Tree Decoration
Looking for a last minute gift idea for someone who has everything? Or maybe you just want crafty idea for yourself? Either way this is the perfect thing...a twig Christmas tree!

I found a image of a twig tree floating around Pinterest and had to try it.
Here's what I used:
8 X 10 canvas
burlap
mod podge
sticks I collect from our town park
yarn (which I had left from this project)
berries from a berry garland
wire cutters (to cut the berries off the garland)
wire cutters (to cut the berries off the garland)
Marion Smith's Vintage Trinkets
hot glue & gun

First I attached my burlap to the canvas. I used Mod Podge to cover the front surface and along the sides. I smoothed out a piece of burlap over top the canvas. I then flipped it over and pulled the burlap tight all the way around it and secured it with hot glue. I allowed the mod podge to dry.
Next, I broke my stick pieces and lined them up on the canvas to take the shape of a tree.

Next I decided to wrap yarn around the "trunk" of the tree. I just wrapped the yarn around it several times and then tied a knot in front. I then glued all the sticks in place. And added some Marion Smith vintage trinkets as the tree topper and some extra embellishments.

Then I made the garland. I took a piece of red yarn and tied knots along it. The knots were made tying them 3 at a time together then moving about an inch (guessing, I didn't actually measure them) away and tied the knots again.
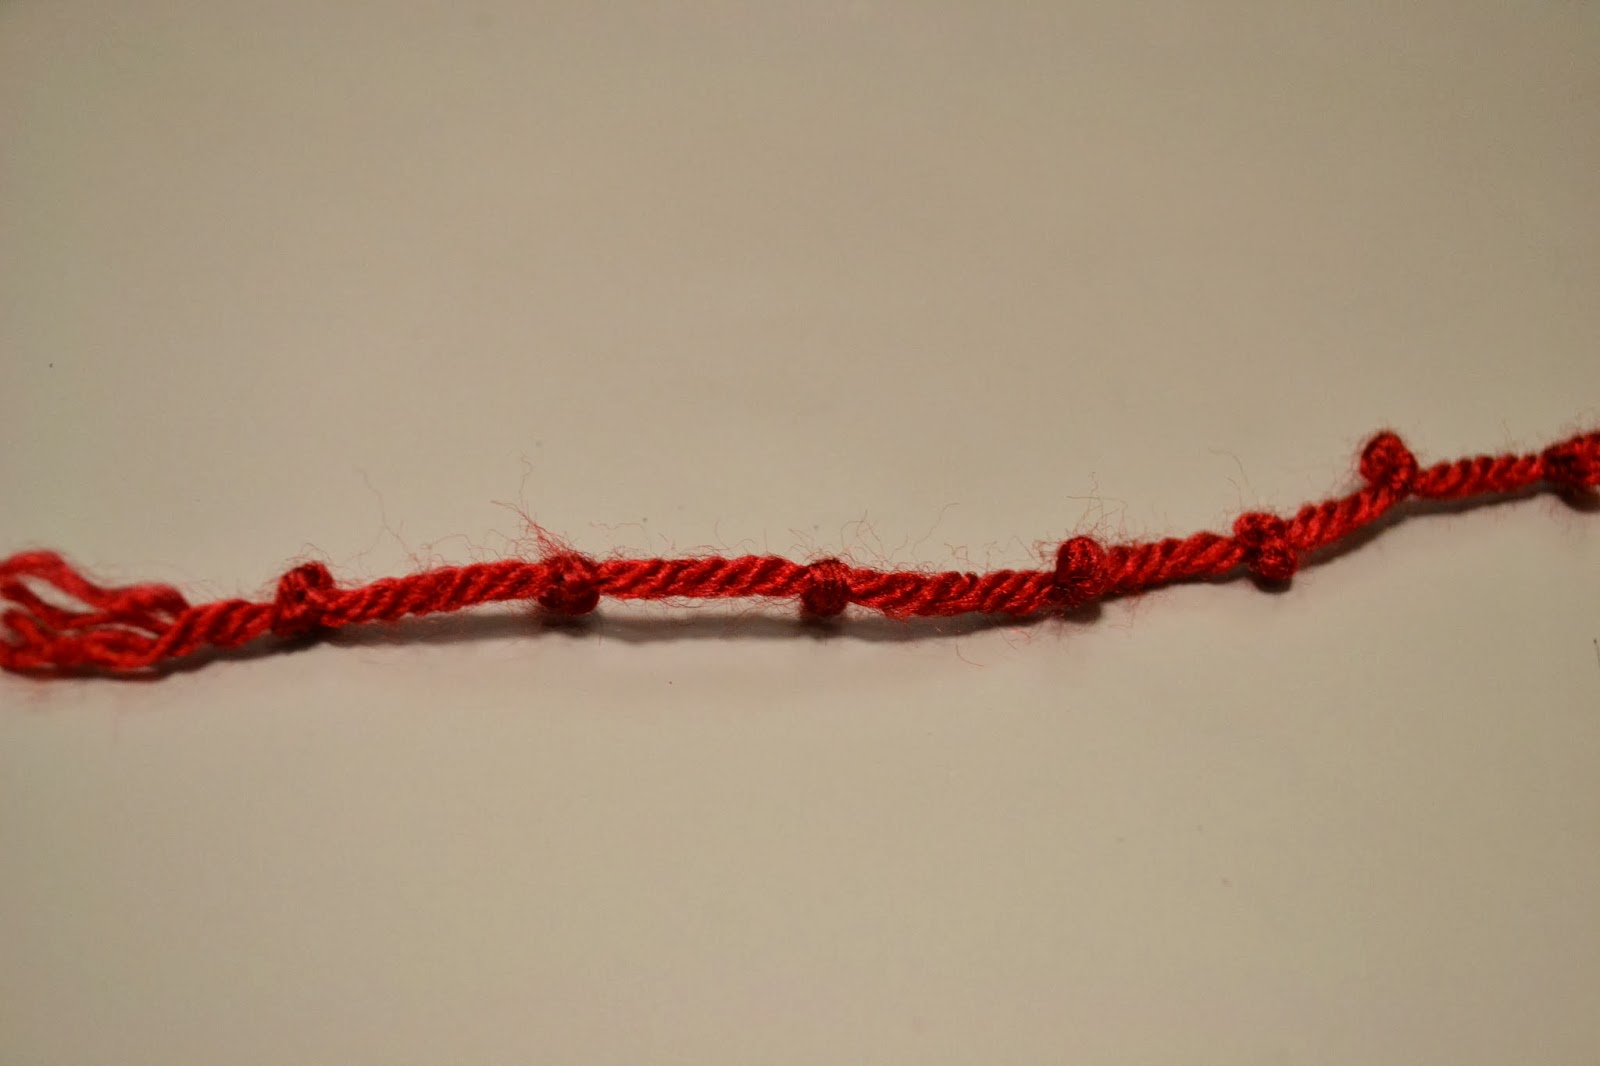

Then I hot glued the yarn in a zig-zag pattern going up the tree.
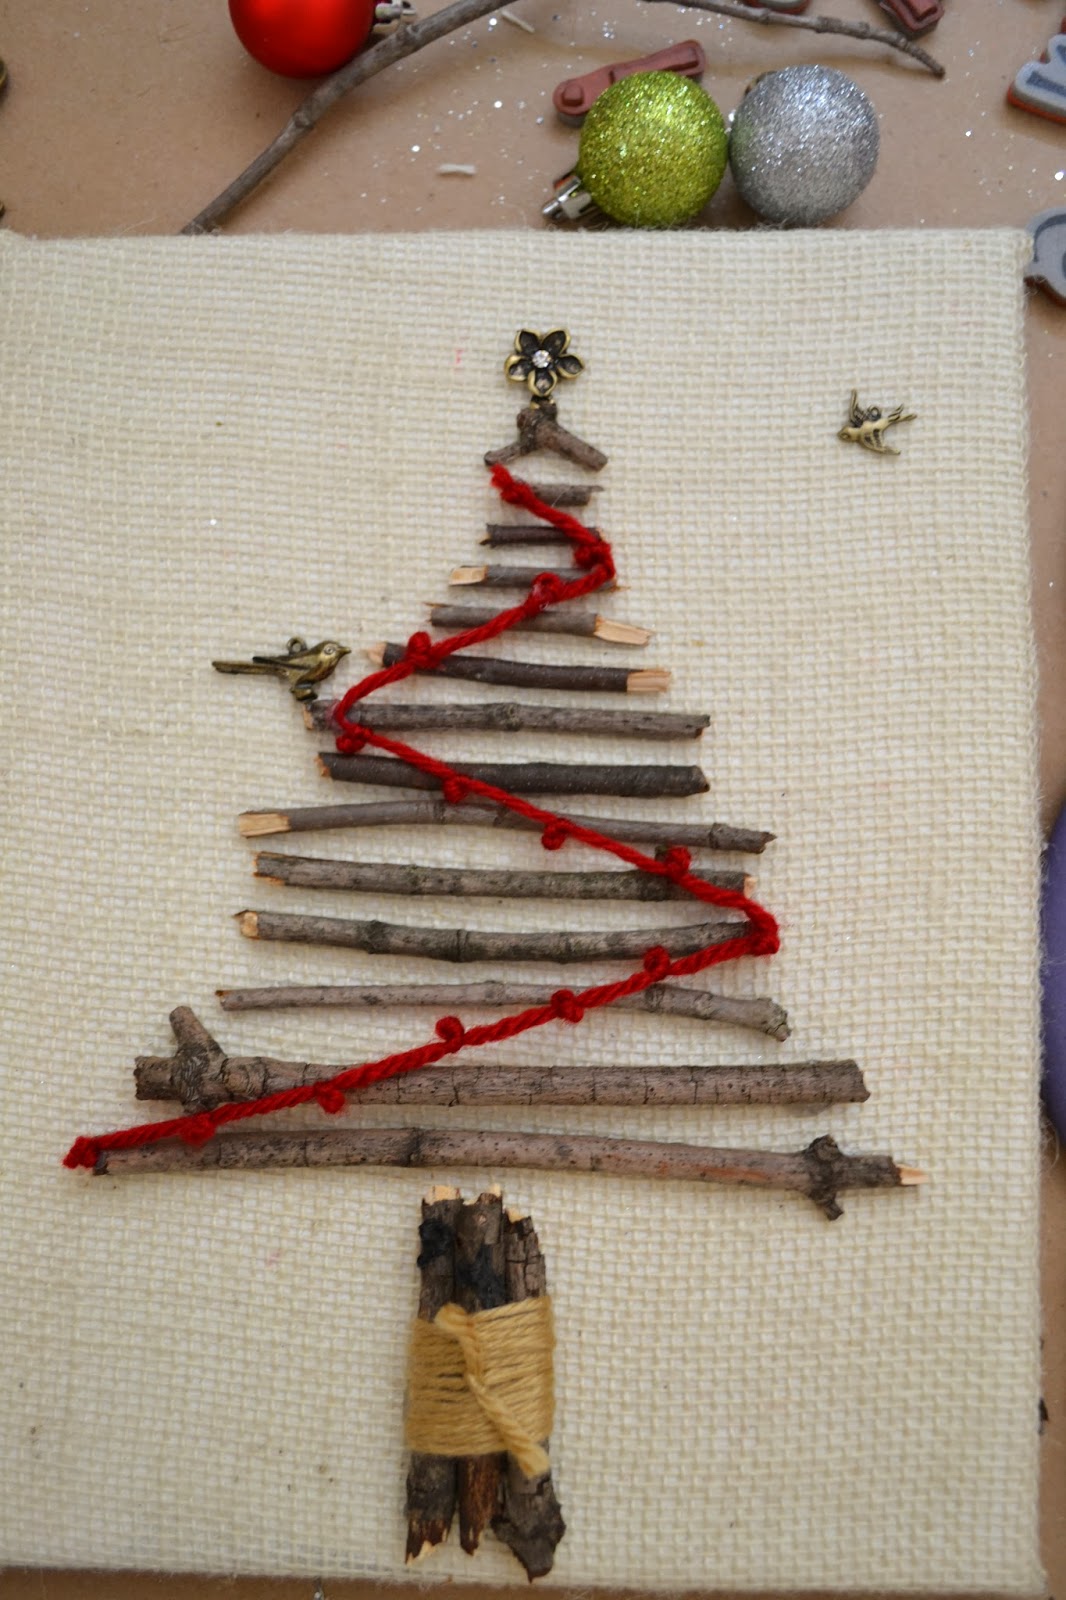
Next, I finished decorating the tree by adding berries I had from a berry garland I bought awhile ago on clearance from A.C. Moore. I used wire cutters to remove the berries then hot glued them into place.


Here's the finished tree!

Hope you enjoyed this quick last minute Christmas decoration. Thanks for stopping by!
Tuesday, August 27, 2013
Decoupage Bird
I recently went to Michael's craft store and had a mini shopping spree. One of the things I purchased was an unfinished wooden bird. Here's a video on how I stained and decoupaged it.
Here's how my final bird came out. I used some berries and leaves from a pick I purchased awhile back and glimmer misted a Prima flower and hot glued them into place.


Tuesday, June 25, 2013
White Washed Wood
At work one night I came out of my exam room to find this brown, wooden box in the housekeeping trash can. I did not dumpster dive for this, it literally was just setting on top of a giant trash bin. And so...I ask if it was trash. Cathy, our lovely Rad. Dept. "environmental service" member assured me that no one wanted it...and so........I took it! It's FREE! My favorite 4 letter F-word. But she made me promise to share with her what I made with it. And I'm not just going to share with her...I'm going to share with all of you! This is my new nightstand!

So I took this old box-like thing...sanded it by hand and cleaned it off...

Next I mixed some latex white paint with water...made it pretty runny (I figured the runnier the better...you can always add layers).Then I dipped a washcloth in the watered down paint and brushed the box, using the same direction for each stroke. I ended up doing 2 coats and allowed them to dry in between (which happened pretty quickly because I did it on my back porch with the 90 degree sun beating down on me).

After it was completely dried, I sanded the edges (cause I like that look).

Finally I sprayed a sealant all over and allowed that to dry. Then I attached it to my wall about nightstand height using shelf brackets (bought from Lowe's) that we had left from a shelf we were using prior to our bedroom makeover.

This was a VERY easy and quick project. I hope it gave you an idea for some trash to treasure projects. Thanks for stopping by!

Sunday, June 16, 2013
Pinspiration Sunday: Pallet Shelf
A while back I pinned an idea for a pallet shelf. So with our bedroom makeover I told my husband I wanted to make one. We talked about where we could get the pallet for FREE (there is that four letter word again)! During our discussion of where we could check, my neighbor, Mark, who owns a painting business, received a delivery on none-other-than...you guessed it, A PALLET! This gave me very high hopes! So the next time I saw Mark I asked if we could have the pallet as long as he didn't need it for anything...The next day he had it propped up against our fence...YAY! But there was a catch...this was a VERY LARGE pallet...which honestly wasn't a problem because we have HUGE, blank walls in out bedroom, but this pallet was not set up like the one I had pinned so I had to do some work. Here's what it looked like when we received it.

But this is what my original pin looked like from Amanda Carver Designs:

For a free pallet, mine was in great condition. Unfortunately for me, I wanted it to look old and I needed it rearranged with some shelving within it because I wanted it to hang horizontally on our wall, not vertically...we actually have plenty of space to do a ginormously tall shelf but...I want what I want...ugh...I had my work cut out for me. Now it was time to get busy taking the boards off one side. I used a hammer and pry bar thing (don't you love my terminology?) to carefully remove the boards...but man, those things were on there good...for the most part I managed to keep the boards in pretty good condition...my husband on the other hand wanted to give it a try and just destroyed a piece...I took back over after that...men. Once the boards were off one side, I took two and reattached one to each end to form a top and bottom.


Next came time to age the wood. I search for ideas and kept finding the same thing...vinegar and steel wool. So I went on a quest to find steel wool. Turns out it's near painting supplies (I totally Googled it while wandering Wal-Mart). I came home, poured the vinegar in a bowl, popped in a few steel wool pads put some gloves on (because I hate the smell of vinegar) and got to rubbing.This is what it looked like in the end of the aging process:

Next came placement of the shelves. There was another partial pallet we had from a long ago project that we needed to cut and fit into this shelf. My husband thought I would cut my fingers off if I used the saw wanted to help out so he handled the saw and attached the shelves. I finished up by attaching some spare pieces to the front. And this is what it looked like when we finished:

Now it's on our wall! YAY!
.jpg)

I'm so proud of this project because it was large and took some hard work and I did almost all of it myself. I've been working on all kinds of projects for our new bedroom. You see those roman shades and that nightstand/shelf in the back corner.? I made 'em! So check back to see those projects posted very soon!
Subscribe to:
Posts (Atom)