Tuesday, September 10, 2013

Nothing Gold Can Stay Release and GIVEAWAY!

My Fall themed printable mini album is ready for purchase! I'm so super excited about this mini. It's great for fall...and pretty much anything else. You can purchase this printable album at my Etsy shop called Ellie's Albums & More for only $10! I'm also doing another GIVEAWAY!!!! WHOO HOO!!! I'm going to giveaway a kit to making this album. I will include all the printouts, the chipboard and probably even some glue and string! You just put it together however you want! To enter to win just follow this blog and I will choose a winner on September 28th. Good Luck!!!!  Below is the video of the album and how to bind it. If you have any questions, feel free to ask!


Thanks for stopping by!!!!


Sunday, September 1, 2013

Winner of the Budding Romance Mini

Hello, everyone. I'm so sorry I missed posting the winner yesterday. I have been sick for a few days and had several visits to the ER. I'm still recovering but I don't want to leave anyone hanging, wondering who the winner is to my first ever giveaway. The winner is...

The Girl Who Went to Texas!

Congrats!

To see what The Girl Who Went to Texas won, check out the YouTube Video which shows you the album and the printable which you can buy from my Etsy shop for only $7.

 I'm almost finished with a Fall inspired printable mini album so keep checking back for that. Once I've completed it, I will have another giveaway for that too. Thank you everyone, for stopping by!

Tuesday, August 27, 2013

Decoupage Bird

I recently went to Michael's craft store and had a mini shopping spree. One of the things I purchased was an unfinished wooden bird. Here's a video on how I stained and decoupaged it.


Here's how my final bird came out. I used some berries and leaves from a pick I purchased awhile back and glimmer misted a Prima flower and hot glued them into place. 


Sunday, August 25, 2013

Pinspiration Sunday: T-Shirt Rosettes on a Wreath


When I originally thought about making these T-shirt rosettes I was going to use an old gray tee I had to cover my lamp shade for this lamp makeover. But then I decided not to. I have pinned several ideas for wreaths and I decided that I would make these flowers for on my wreath. Now some wreaths I pinned were spray painted...and I absolutely wanted to do that in the Spring which was when I purchased my grapevine wreath...and well...it was still sitting in my craft room closet with the price tag still on...but now I have made a gorgeous new wreath anyways...just a little different than originally planned.

I previously posted a video showing how to make the yellow flowers. You can see the how-to here. This post will show you how I made the orange flowers. First I had an old T-shirt that was given to my by a friend for FREE! (Love that word!) I was going to make a reusable shopping bag, but never did get around to making one with this shirt. {Please ignore the ugly stains on my carpet...Good Tip: always lay something down and around where you Glimmer Mist!}


Then I cut it into strips. I started at the seam along the bottom but was not using the bottom as a flower (I used it later on). I cut a total of 4 strips about an inch in thickness.


I cut two of the strips of t-shirt along one fold making two long strips. Then I cut the other two along each fold (2 cuts) making 4 shorter strips. This gave me 6 total flowers.

Next I used this awesome tape I got from Michael's. I only used this because it was had...LOL. But you would want to use something similar, just maybe not as decorative as the tape won't be seen.


Take one strip and fold it in half length wise


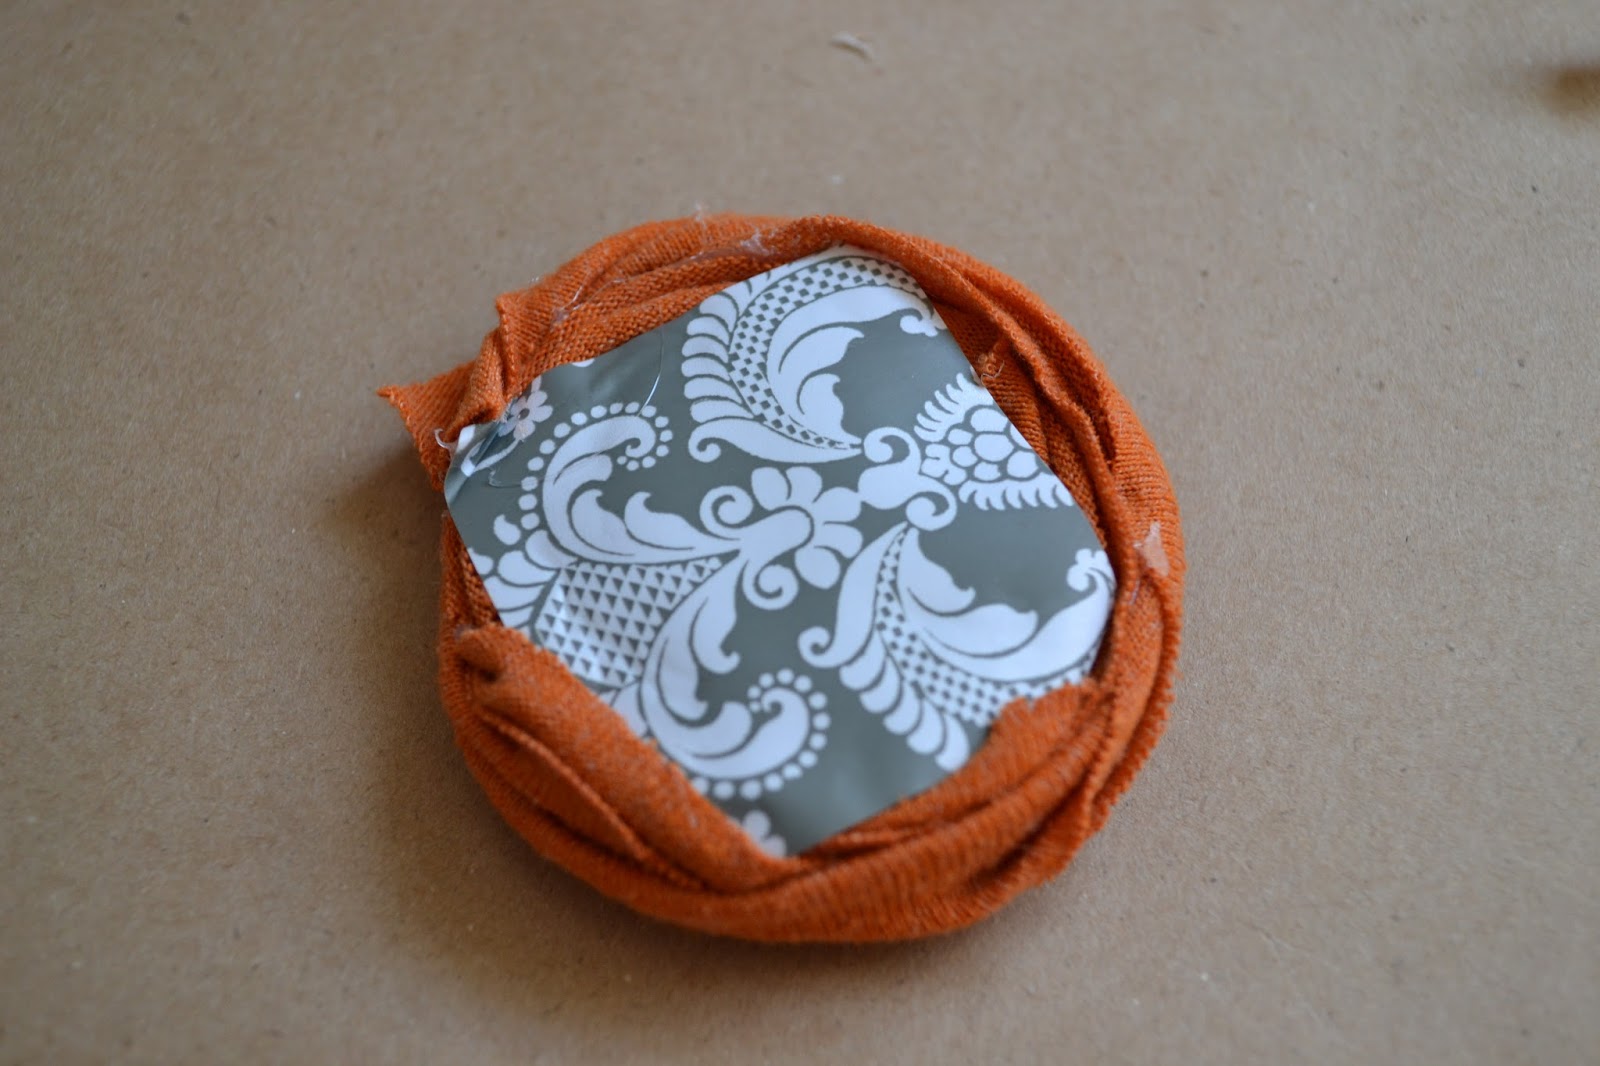
Next start at one end rolling and turning creating your center.


Although the tape helped hold the fabric together as I rolled I thought added some hot glue could only help and not hinder. 


Just keep rolling around, hot gluing when you need to. 


Once I reached the end I secured it down with hot glue. This is what the bottom looks like.


Then I just placed my flowers on my wreath. I figured out how I wanted them placed BEFORE I hot glued them down. Deciding the orange weren't enough, I added the yellow...and I still wanted some more filler so I added in some leaves. Then I used the T-shirt bottom as my hanger at the top. 


Hope you enjoyed this tutorial. If you have any questions, don't hesitate to ask. Thank you for stopping by!


Sunday, August 11, 2013

Pinspiration Sunday: BOO! Sign

So I've seen a lot of signs on Pinterest that say "BOO!" And I finally decided it was time to make my own. Everything I used in this project I already owned...whoo hoo! So here's how mine turned out:


Mine got a little bigger than I was originally aiming for. Here's my original pin:

fall wood crafts | Burlap HALLOWEEN wood Stacked Home Decorating Blocks Fall Decorating ...

This beautiful sign was for sale in an Etsy Shop called PeaceGlitzNGlam but has since sold.

I began my project with 3 wood pieces...I have a ton of these because I came across them one day in ACMoore and they were only 25CENTS!!!!! 


I painted the fronts and sides with black craft paint and a sponge brush. I use sponge brushes whenever I can. They are crazy cheap and great to use and toss especially when working with Mod Podge!


After they dried it was time to cut the burlap. I happen to have a strip cut from a prev project which also happen to be the perfect width. All I had to do was cut the length. Burlap frays so easily...so here's a tip: pull one or two fibers out from the area you want to cut, then cut through that area. See the picture below? I pulled a thread out. then cut along that open space.


I did this for all three wood pieces. Then I covered the wood pieces with Mod Podge and pressed the Burlap on top to secure.


Next, I cut out letters using the Happy Hauntings font on my Cricut Craft Room and some creepy spider paper I had left from a previous Halloween mini album.


I decided then to ink the edges using Tim Holtz distressed ink in Peeled Paint. But after I started inking the edges, I decided to blend and cover the entire letter. I knew that I wanted to use 3D adhesive dots to help the letters stick off the wood pieces, but my paper was really thin. So I decided to laminate them. This also helped me to ensure that my sign could last through the years.


For some reason I decided to take this project even further. I had this picture and frame that I bought at a thrift store months ago for $1 or $2.


I pulled all those staples out.


Then I tried painting the front with craft paint. But I realized it was going to take A LOT of coats to cover it. So I flipped it over and painted the back. 


I had this bottle of crackle medium...it's a very OLD bottle...but I gave it a shot...


After covering the frame with the crackle medium and allowed it to dry, I painted the frame black.


It worked...okay...but it's supposed to look grungy so it worked for me! By the end I went along some ridges and edges of the frame with silver craft paint too. While that dried I finished off the "picture" part. I knew I wanted something else for the background...plain purple just wasn't going to work. I thought about drawing some spiders on...but then I looked through my lace and I had a small piece of black that was just a bit longer than what I needed! WHOO HOO! Perfect! I covered the purple area with Mod Podge and pressed the lace on top to secure. Then I cut the excess off the ends.


Once it was all dry, then it was time to put the background back into the frame. I secured it with nails I had in a tool kit and added a picture frame hanging bar thing (technical name, I'm sure) to the back. Next I hot glued the wood pieces into place. The hands came from a bag full that I got from Michael's (and they have them this year too)!


Hope you enjoyed this tutorial! Thanks so much for stopping by!


Wednesday, August 7, 2013

Autumn is Coming!

I know it's only August 7th...and I don't know where you're from, but here in Pennsylvania the nights have gotten a bit chilly...and I'm anxious for Autumn to get here. Autumn is by far my FAVORITE time of year. And I have had Autumn on the brain all week. I'm working on new craft projects to help you guys get ready for Autumn too. I don't have many Autumn/Halloween decorations, so be prepared for some tutorials on making some. Not only that, but I have been hard at work on new printable mini albums! A Autumn and a Halloween mini will be coming out soon in my Etsy Shop. Lots of great new things are coming so be sure to check back often. Also, don't forget about the FREE MINI ALBUM GIVEAWAY!!! I'm giving away the mini album I showed on my YouTube video posted here. All you have to do to enter is follow this blog. I'll be picking a winner on August 31! Good Luck! Thanks for stopping by!

Monday, August 5, 2013

DIY Burlap Roses

I had a post awhile back about glimmer misting burlap...in that post I mentioned that I made roses out of them. Here's a video to show how to make your own burlap roses.


Thanks for stopping by!