Showing posts with label photography. Show all posts

Sunday, May 26, 2013

Pinspiration Sunday: Transfer Laser Copy Picture to Canvas


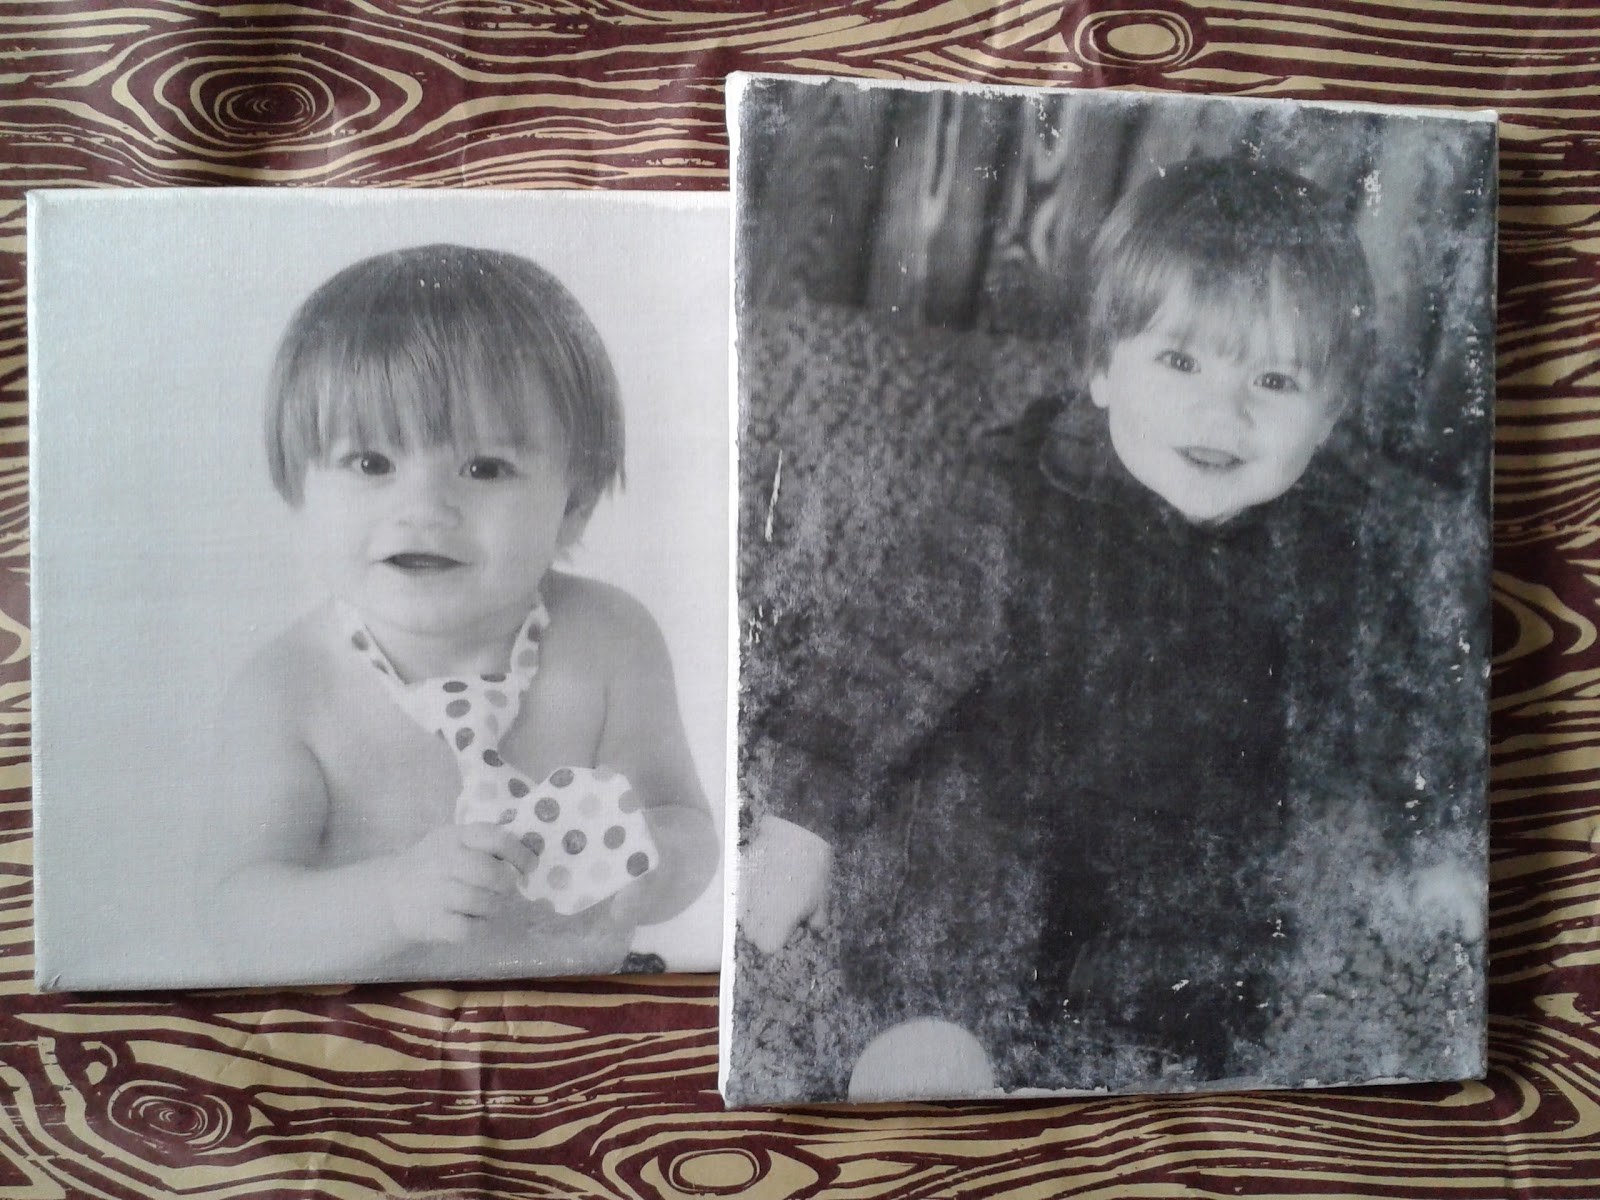
Thanks to the wonderful world on Pinterest, my best friend, Angela, and I stumbled across A Beautiful Mess and we're pretty much desperate to hang out with Elsie and Emma. They encompass all that we love. There are a number of great projects that I am looking forward to creating….and this is one of them. This is transferring a picture to canvas. I’ll take you through how I made my first one, however, I don’t really like how it turned out. The reason being is that I think there is too much dark tones so I tried it with a lighter image and I love how it turned out.


So here’s what I used:
Laser copy of picture (I made it 8 X 10 because that’s the size canvas I had)
Spray bottle with water
Paint brush
Canvas (I got a 10 pack from A.C. Moore. It was regularly $19.99 but I used a 40% coupon!)

My pictures are from the very talented Karey Dean of Karey Dean Photography.  She captures the most beautiful images. And to be honest, since these pictures are a black and white copy they DO NOT  do her work justice. She is so incredibly talented! You can check out her amazing portraits and other photos on her website,  her blog or on Facebook.


I covered the entire front of an  8 X 10 canvas with the Liquitex.
 Placed my photocopied image face down on top of the canvas, smoothed it out and allowed it to dry overnight.
 

The next morning I misted the paper with water from my spray bottle and gently rubbed until the image showed through. This is a long process….don’t try to hurry it too much or you will rub the image right off the canvas (although I like the look of that scattered throughout).

 
Once finished, seal in the image with the gel medium and allow to dry….then hang and enjoy!

The darker the image the more the paper fibers showed....so, I tried it with a picture a little brighter.
 
 
I just want to thank you, Karey, for allowing me to use your stunning pictures for this! And thank you to everyone who stopped by to check out this project!

**Special Note: A Beautiful Mess had lots of questions from their original post. I encourage you to check them out if you are having any difficulties. They go through and show different techniques and products used which did not have as good of an outcome as I have just demonstrated. I followed exactly how they described being the best way to complete this project....have fun!

Tuesday, August 21, 2012

Chalkboard Flags

So I wanted to make some chalkboard props for my friend's fastly approaching wedding. I bought some unfinished wood flags awhile back when I purchased my other prop making items. Unfortunately I didn't take a before picture of the flags, sorry. I bought 5 altogether and they were clearanced for 25 cents each (bonus!)I bought a can of chalkboard spray paint for a few bucks at Walmart. I sprayed 2 coats over the flag. It did cover the part of the handle but I thought I would just pain over that anyways. But when I tried to, my paint would not cover it. So I painted to the rest of the handle black to match. I didn't want black handles though...so I looked though my mess of supplies (and I do mean mess...my craftroom looks like the police came with a search warrant) and found some lace. I used mod podge on the handles, put the lace over top and allowed it to dry overnight. The end product looks like this:


I did 3 of the 5 flags as chalkboards. The other two I did something a little different. You'll have to check back for that finished product later! Thanks for stopping by :0)

Sunday, July 1, 2012

Props!

Started working on the props for Angela and Jon's photo booth...I googled some photo booth printables and found this great site and basically cut them out, traced them on to foam and attached sticks
A few of the mouths I liked so I just glued them to the foam to make them sturdy. All the products I used were bought from AC Moore. I bought foam to make some and they had really cool wood masks too that you paint yourself. This I thought would be really fun. I bought 2 owls (me and Angela's thing) and a cat and dog...the cat and dog didn't turn out too well but the owls are pretty cute. The one I tried to paint silimar to here wedding colors (which doesn't show up that well in the picture) and the other is kind of purple...somehow mixing a brown and tan color got me purple, I dunno...but here are the owls...
I will not show you the dog and cat (they are just not pretty...nope) I think I will try to redo them or just get rid of them all together. I'm also going to make chalkboard signs so people can write whatever they want...I'll show more when I have more to show :)


Wednesday, November 16, 2011

Womb to the World

Well I'm now 38wks preggers and we are impatiently awaiting Grayson's arrival. I've worked on his album as much as I can. I seperated each page as one month of pregnancy and it will included his birth and coming home. I thought I would show you what I have done so far. The album I used I bought from marionsmithdesigns.com. As I have shared before, I love her work and she sells great products. This is what the album looked like before I tore it apart.
 

Here are the inside pages...the whole book is made of heavy chipboard


I used paint to cover the pages, seperating each trimester by color. I used a variety of papers, prima flowers, ribbons, bling, buttons, glimmer mists ect. And item's designed by Marion Smith and Tim Holtz. Here's the album so far...


This pull tab is great! Learned it from Marion Smith! Check out how to make it from her video on ustream


This leaf we found at our Maternity photo shoot and we took a picture with it next to my belly...I love fall and I loved that picture...I saved the leaf and mod podged it to my page


I embellished this book with lots of flowers and other items with 3D dots which made it too large for the original binding. So I had to cut the covers off and I just bound it with ribbon then embellised the binding with the birdcage and pin. I really like the way this book is turning out...now we just gotta get this little guy out so I can finish it! Thanks for looking...hope you like it too!

Sunday, July 11, 2010

Lomo Action Sampler

The Lomography website had a sale on some of their merchandise about a week and a half ago. I bought some film and I bought another camera. This is a 35mm camera that has 4 lenses. It’s called an action sampler. They actually make them with 6 and 9 lenses but this one was cheap ($20) so I went with this one. Unfortunately, I have a lot to learn about this camera too. Only about 10 images actually are visible but luckily the camera came with a roll of film so I’m not too upset that it was kind of a waste of 36 exposures. What I learned from this first run with Boing (that’s what I call it because it was labeled the “football” style camera…it says “Boing” on it and the “o” is a soccer ball) is that aim is important, lots of light is important and, of course, movement is important. Some of my images kind of cut off what I was trying to focus on. And my indoor pictures are not distinguishable and if there is no movement, then its just the same 4 images. What I liked about the images were some pretty colors. Some of them were just so blue…one of the reasons I like lomo cameras is the way an image can be saturated with a color with or without a color flash. I’m working with Diana still…I’m trying to find out where I can get 120 film developed without being so costly….I’ll be sure to update on that…for now enjoy some of the images I got with BOING!