Showing posts with label ACMoore. Show all posts

Wednesday, February 11, 2015

A little Love

Hey guys! It's been so long...I've missed ya! So my life got a little crazy in October with the birth of my daughter...which was to be expected. I found a little time this weekend to work on a project finally. Here's the video: 


Also, if you haven't already, check out these posts for free printables to create more 
Valentine's Day decor.

Thanks for stopping by!


Thursday, December 19, 2013

Twig Tree Decoration

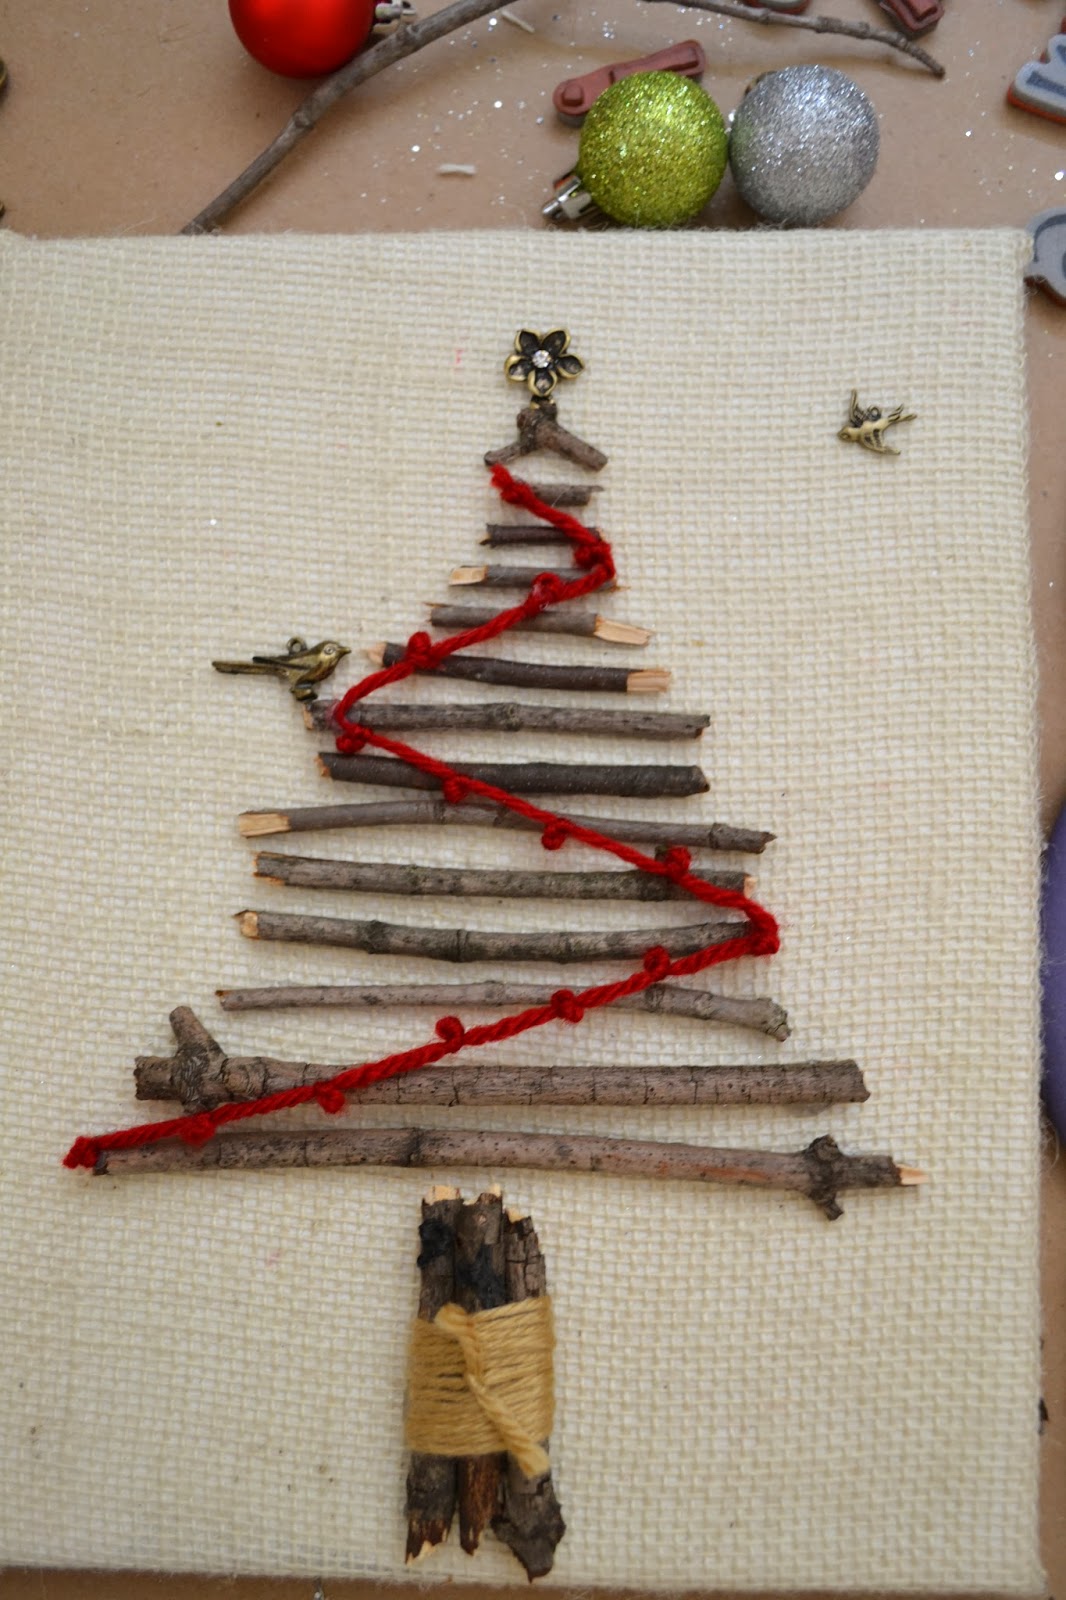
Looking for a last minute gift idea for someone who has everything? Or maybe you just want crafty idea for yourself? Either way this is the perfect thing...a twig Christmas tree!


I found a image of a twig tree floating around Pinterest and had to try it.

Here's what I used:

8 X 10 canvas
burlap
mod podge
sticks I collect from our town park
yarn (which I had left from this project)
berries from a berry garland
wire cutters (to cut the berries off the garland)
Marion Smith's Vintage Trinkets
hot glue & gun


First I attached my burlap to the canvas. I used Mod Podge to cover the front surface and along the sides. I smoothed out a piece of burlap over top the canvas. I then flipped it over and pulled the burlap tight all the way around it and secured it with hot glue. I allowed the mod podge to dry.
Next, I broke my stick pieces and lined them up on the canvas to take the shape of a tree. 


Next I decided to wrap yarn around the "trunk" of the tree. I just wrapped the yarn around it several times and then tied a knot in front. I then glued all the sticks in place. And added some Marion Smith vintage trinkets as the tree topper and some extra embellishments.


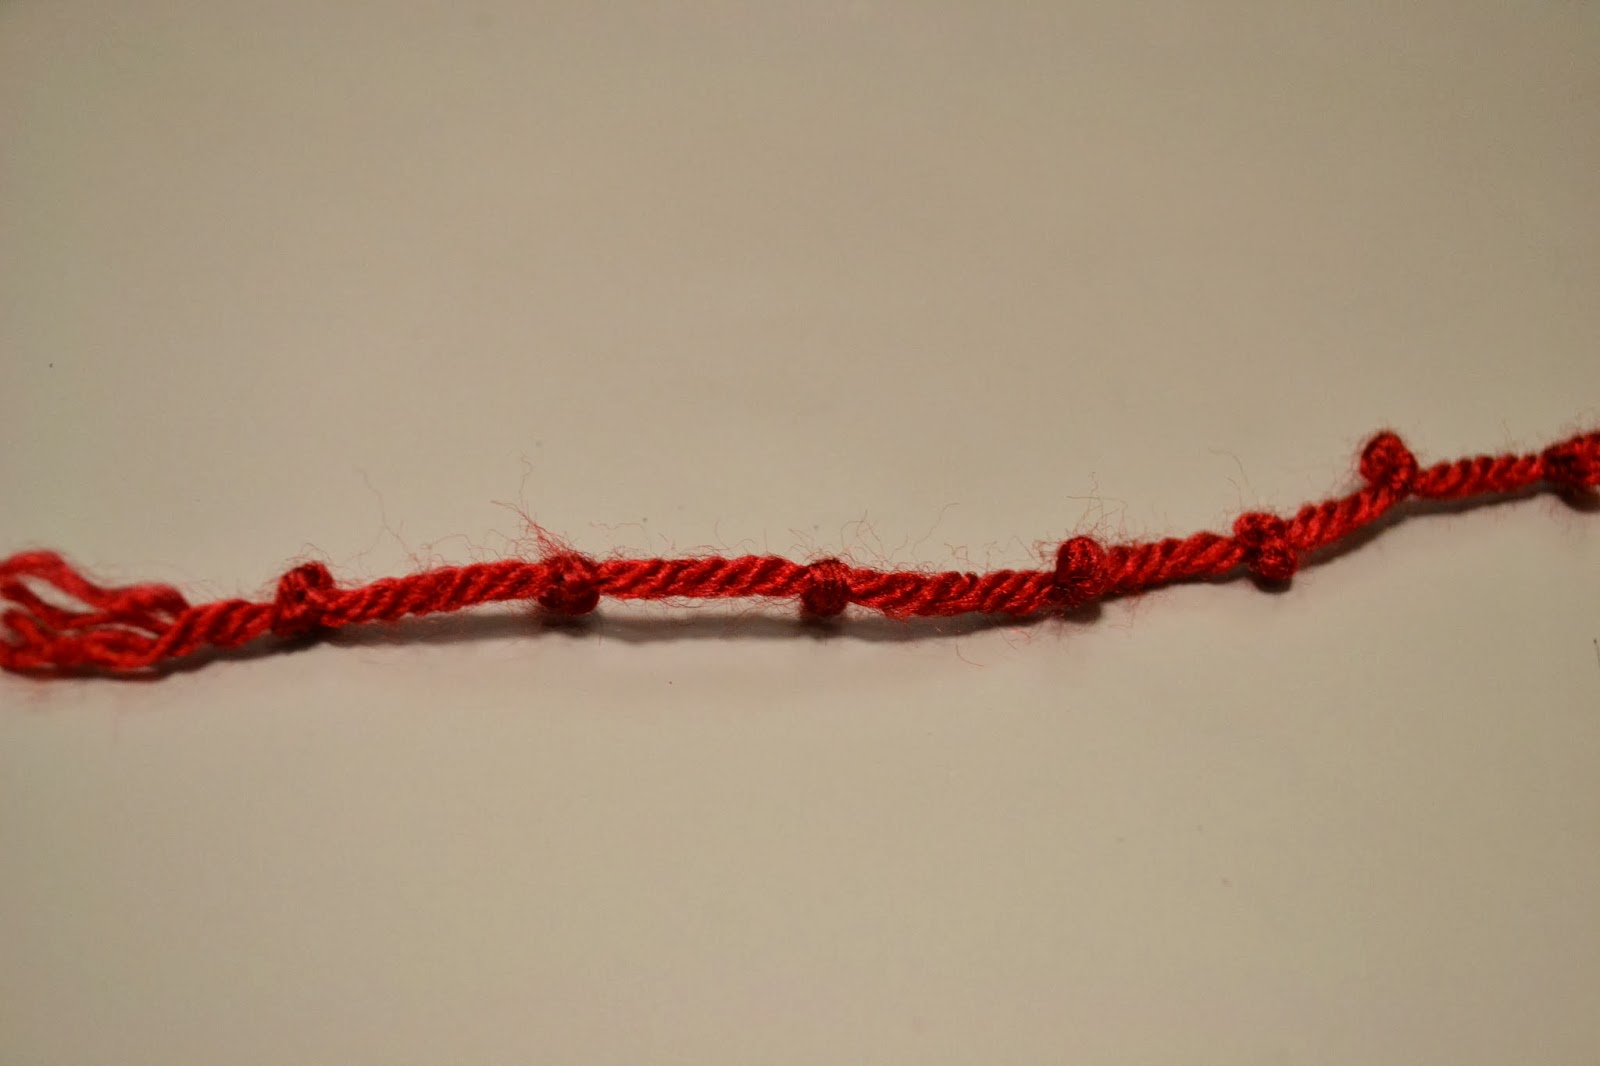
Then I made the garland. I took a piece of red yarn and tied knots along it. The knots were made tying them 3 at a time together then moving about an inch (guessing, I didn't actually measure them) away and tied the knots again.


Then I hot glued the yarn in a zig-zag pattern going up the tree.


Next, I finished decorating the tree by adding berries I had from a berry garland I bought awhile ago on clearance from A.C. Moore. I used wire cutters to remove the berries then hot glued them into place.


Here's the finished tree!


Hope you enjoyed this quick last minute Christmas decoration. Thanks for stopping by!


Tuesday, December 17, 2013

DIY Colored Book Page Ornament


Every year near Christmas we have a celebration week at work. Each day is something different. One day is ornament day. You bring in ornaments and we pick another's to take. Last year I got a set of four. And they were pretty, but they were gold...and I am not a fan of gold. No worries, I have a DIY project.

Here's what you'll need:
an ornament to cover
book pages
mod podge
paint brush
wire cutters
food coloring
berries and leaves
hot glue 
stick (or as I used, a wooden spoon) to hang your drying ornament

 As I have stated in a number of other posts, I have a few old Reader's Digest books laying around...so I used one of those and ripped up some pages. Next I attached the pieces of the book pages to the ornament using mod podge (sorry I didn't take a pic of that, but I think you can see what I mean in the next picture). I made sure none of the original ornament was showing. I allowed that to dry. After it dried, I mixed some red food coloring with some mod podge and brushed that over the entire surface. I hung it on a spoon hanging over a table to dry.


 Once it dried I used 2 leaves from a pack of Recollections' Holly leaves... as well as a few berries from a Christmas pick I bought from AC Moore a few years back. (I used a pair of wire cutters to cut the berries I wanted from the pick).
I figured out where I wanted them on the ornament and then I hot glued them in place. Once I was finished I had something like this:


Hope you liked this simple and fun tutorial. Let me know if you try it out! Thanks for stopping by!

Sunday, December 15, 2013

Pinspiration Sunday: Yarn Wrapped Wreath with Felt Flowers

So I found a beautiful wreath from ItzFitz Etsy shop on Pinterest. It looked so stinking cute that I thought, "hey! maybe I could make that". And so I tried...and here's how it turned out:


I got my yarn and berries from AC Moore. And I had felt on hand from previous projects. I bought a straw wreath from Wal-Mart. I wrapped the yarn around the entire wreath. Then I used the red and green as accents. I secured the loose ends with hot glue on the back side of the wreath. Next came time to make the felt flowers. Here's a quick video to show you how I made them. 


Next I just cut my berry stems and arranged them where I liked them and then hot glued them into place. And that was it. This project was neither quick nor simple for me. The wrapping of the tan yarn took a long time and I struggled making the felt flowers at first but I finally found a method. After numerous ideas for decorating the wreath I finally came up with this and I love it. I hope you do too. Thanks for stopping by!

Sunday, August 11, 2013

Pinspiration Sunday: BOO! Sign

So I've seen a lot of signs on Pinterest that say "BOO!" And I finally decided it was time to make my own. Everything I used in this project I already owned...whoo hoo! So here's how mine turned out:


Mine got a little bigger than I was originally aiming for. Here's my original pin:

fall wood crafts | Burlap HALLOWEEN wood Stacked Home Decorating Blocks Fall Decorating ...

This beautiful sign was for sale in an Etsy Shop called PeaceGlitzNGlam but has since sold.

I began my project with 3 wood pieces...I have a ton of these because I came across them one day in ACMoore and they were only 25CENTS!!!!! 


I painted the fronts and sides with black craft paint and a sponge brush. I use sponge brushes whenever I can. They are crazy cheap and great to use and toss especially when working with Mod Podge!


After they dried it was time to cut the burlap. I happen to have a strip cut from a prev project which also happen to be the perfect width. All I had to do was cut the length. Burlap frays so easily...so here's a tip: pull one or two fibers out from the area you want to cut, then cut through that area. See the picture below? I pulled a thread out. then cut along that open space.


I did this for all three wood pieces. Then I covered the wood pieces with Mod Podge and pressed the Burlap on top to secure.


Next, I cut out letters using the Happy Hauntings font on my Cricut Craft Room and some creepy spider paper I had left from a previous Halloween mini album.


I decided then to ink the edges using Tim Holtz distressed ink in Peeled Paint. But after I started inking the edges, I decided to blend and cover the entire letter. I knew that I wanted to use 3D adhesive dots to help the letters stick off the wood pieces, but my paper was really thin. So I decided to laminate them. This also helped me to ensure that my sign could last through the years.


For some reason I decided to take this project even further. I had this picture and frame that I bought at a thrift store months ago for $1 or $2.


I pulled all those staples out.


Then I tried painting the front with craft paint. But I realized it was going to take A LOT of coats to cover it. So I flipped it over and painted the back. 


I had this bottle of crackle medium...it's a very OLD bottle...but I gave it a shot...


After covering the frame with the crackle medium and allowed it to dry, I painted the frame black.


It worked...okay...but it's supposed to look grungy so it worked for me! By the end I went along some ridges and edges of the frame with silver craft paint too. While that dried I finished off the "picture" part. I knew I wanted something else for the background...plain purple just wasn't going to work. I thought about drawing some spiders on...but then I looked through my lace and I had a small piece of black that was just a bit longer than what I needed! WHOO HOO! Perfect! I covered the purple area with Mod Podge and pressed the lace on top to secure. Then I cut the excess off the ends.


Once it was all dry, then it was time to put the background back into the frame. I secured it with nails I had in a tool kit and added a picture frame hanging bar thing (technical name, I'm sure) to the back. Next I hot glued the wood pieces into place. The hands came from a bag full that I got from Michael's (and they have them this year too)!


Hope you enjoyed this tutorial! Thanks so much for stopping by!


Sunday, May 26, 2013

Pinspiration Sunday: Transfer Laser Copy Picture to Canvas


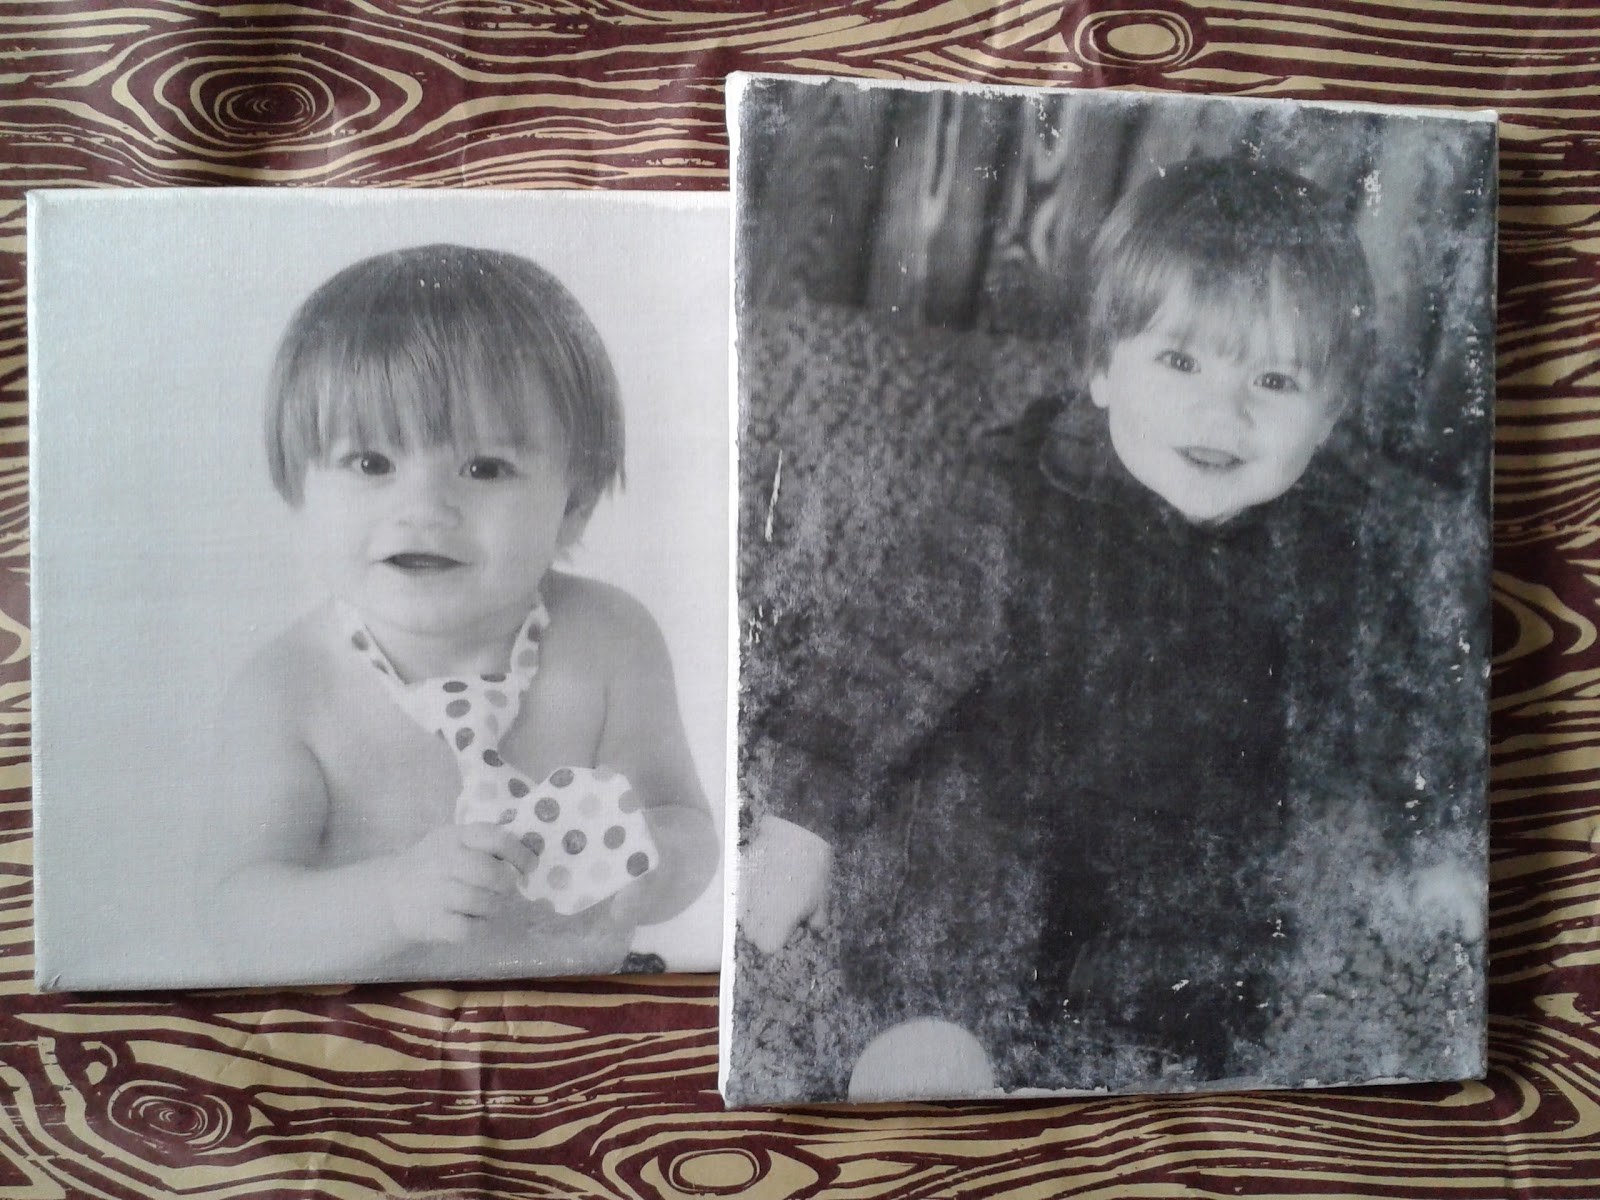
Thanks to the wonderful world on Pinterest, my best friend, Angela, and I stumbled across A Beautiful Mess and we're pretty much desperate to hang out with Elsie and Emma. They encompass all that we love. There are a number of great projects that I am looking forward to creating….and this is one of them. This is transferring a picture to canvas. I’ll take you through how I made my first one, however, I don’t really like how it turned out. The reason being is that I think there is too much dark tones so I tried it with a lighter image and I love how it turned out.


So here’s what I used:
Laser copy of picture (I made it 8 X 10 because that’s the size canvas I had)
Spray bottle with water
Paint brush
Canvas (I got a 10 pack from A.C. Moore. It was regularly $19.99 but I used a 40% coupon!)

My pictures are from the very talented Karey Dean of Karey Dean Photography.  She captures the most beautiful images. And to be honest, since these pictures are a black and white copy they DO NOT  do her work justice. She is so incredibly talented! You can check out her amazing portraits and other photos on her website,  her blog or on Facebook.


I covered the entire front of an  8 X 10 canvas with the Liquitex.
 Placed my photocopied image face down on top of the canvas, smoothed it out and allowed it to dry overnight.
 

The next morning I misted the paper with water from my spray bottle and gently rubbed until the image showed through. This is a long process….don’t try to hurry it too much or you will rub the image right off the canvas (although I like the look of that scattered throughout).

 
Once finished, seal in the image with the gel medium and allow to dry….then hang and enjoy!

The darker the image the more the paper fibers showed....so, I tried it with a picture a little brighter.
 
 
I just want to thank you, Karey, for allowing me to use your stunning pictures for this! And thank you to everyone who stopped by to check out this project!

**Special Note: A Beautiful Mess had lots of questions from their original post. I encourage you to check them out if you are having any difficulties. They go through and show different techniques and products used which did not have as good of an outcome as I have just demonstrated. I followed exactly how they described being the best way to complete this project....have fun!